Family and Thanksgiving is always a great time to get creative with a craft. Make this fun and easy brown paper bag turkey decoration and have your guests wanting to take it home with them! It all starts with things you have around your house and a few you might need to purchase.
Let me share with you the items I used to make our table decorations: One brown bag, two small brown lunch bags, white paper (for the drumstick tips), tissue paper (stuffing for the inside), string, tape, a stapler, large popcorn bag from your favorite place and two small snack size bags of caramel corn or kettle corn.
Personal story: We wanted to make our own organic popcorn to gift our friends, so we tried to pop it ourselves over the stove top. We recommend you do not try this at home unless you are a professional cook. It took us several hours to make one Brown Bag Turkey to gift because we kept burning the organic popcorn. What we did to make things easier and improve the process of making several turkeys was to shop at Trader Joes. LOL!!!! Yes, homemade popcorn is delicious but we will leave it to the professionals.
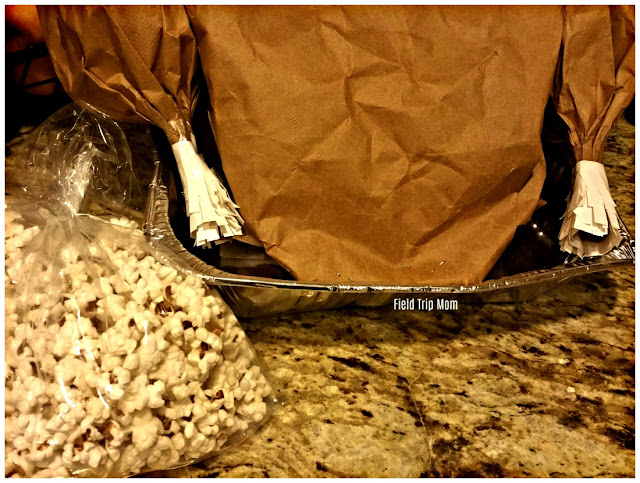
Depending on the size of your brown bag, it may take two to three bags and some stuffing (colorful tissue paper) to make the body of the brown bag turkey. Start by turning your brown bag inside out to get rid of any store logos that may be printed on the bag. Place the popcorn in the bag and stuff tissue paper around it. The bottom of the bag must be nice and full. The opening of the bag must be less filled so that you can fold at an angel and staple. See picture below.
To make the turkey legs you will need two small popcorn bags of a different flavor. We used Kettle corn from Trader Joe's. Fill the small bags with the snack size popcorn bags. Then use the cotton string to tie it towards the end. Make sure to twist the end of the bag as you tie it. Then cut a piece of white paper into a small stripe of paper. It should be 8 inches long and about 2 inches tall. Cut small slits about 1/4 apart. This white piece will be used at the end of the turkey legs. Then tape the white paper to ends of the turkey legs to make it look fancy. See picture above for reference.
To make the turkey legs you will need two small popcorn bags of a different flavor. We used Kettle corn from Trader Joe's. Fill the small bags with the snack size popcorn bags. Then use the cotton string to tie it towards the end. Make sure to twist the end of the bag as you tie it. Then cut a piece of white paper into a small stripe of paper. It should be 8 inches long and about 2 inches tall. Cut small slits about 1/4 apart. This white piece will be used at the end of the turkey legs. Then tape the white paper to ends of the turkey legs to make it look fancy. See picture above for reference.
Once you have two legs and one turkey body it is time to glue it together. This is when you will use the hot glue gun. Glue the legs on the body with the white piece sticking out a little from the thin side of the turkey body.
Make a few to decorate your home and to have on-hand for gift giving. Open one popcorn turkey to share with your guests and then surprise them with one to take home. It is a fun way to celebrate Thanksgiving.
Hope you and your family have a wonderful holiday season!!!!
Hope you and your family have a wonderful holiday season!!!!


No comments:
Post a Comment