Valentine's Day is just around the corner. Why not make beautiful paper flowers for the person you love and watch them get inspired by your craft. A few months back, we had the opportunity to make two dozen paper flowers that we gave away. The kids were amazed how paper, a stapler and scissors created some beautiful large bouquets of flowers. The adults that received them asked where we bought them? When they heard they were handmade by us their hearts melted and were extremely thankful.
Supplies you will need:
- Card stock paper - We used Reflections purchased from Joann's Fabric and Craft store. Buy several different colors of paper. We used size 8 1/2 x 11 inches.
- Sharp Scissors
- Staplers
- Tape
- Ruler
- Hot Glue Gun and glue sticks.
Instructions:
First, decide how big you want your flower to become. Then cut the petals different sizes into tear drop shapes. Your first flower will be a tester as it will become easier the more you make. We made three different size patterns: Small, Medium and Large. Use a whole 8 1/2 X 11" piece of paper for the large petals, half of a sheet or 5 1/2 X 8 1/2" piece of paper for the medium petals and a quarter of a sheet or 4 1/4 X 5 1/2" piece of paper for the small petals. We made the large petal first and then worked our way down. You will need to cut 5 - 6 large, 4 - 5 medium and 3 - 4 small petals for one flower. We played around with the combination of petals to make the flowers look different. You can also start with medium or small sizes as the outer petals and cut smaller pieces of paper for the inner petals.
First, decide how big you want your flower to become. Then cut the petals different sizes into tear drop shapes. Your first flower will be a tester as it will become easier the more you make. We made three different size patterns: Small, Medium and Large. Use a whole 8 1/2 X 11" piece of paper for the large petals, half of a sheet or 5 1/2 X 8 1/2" piece of paper for the medium petals and a quarter of a sheet or 4 1/4 X 5 1/2" piece of paper for the small petals. We made the large petal first and then worked our way down. You will need to cut 5 - 6 large, 4 - 5 medium and 3 - 4 small petals for one flower. We played around with the combination of petals to make the flowers look different. You can also start with medium or small sizes as the outer petals and cut smaller pieces of paper for the inner petals.
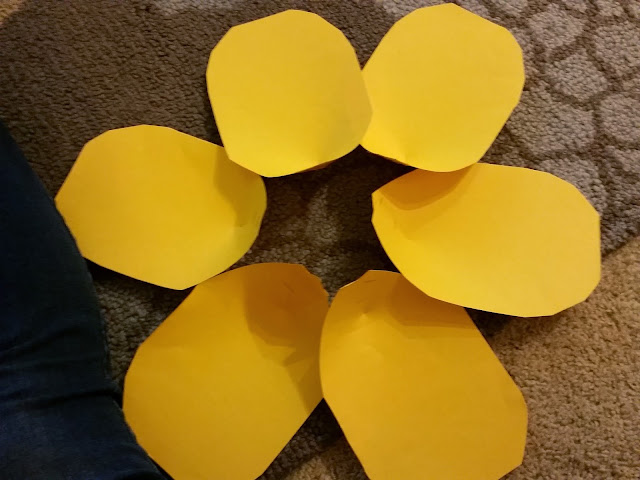
Once you have all your petals cut and arranged, you can then start cutting a small 1" to 4" slit on each petal. You will cut the slit on the bottom pointed part of the tear drop. The longer the cut, the more flexibility you will have in the curve of your petal. The purpose of this cut is to allow you to cross the two slits together and staple to make a small bend in the flower. The paper slit should over lap a little to make it look like a tiny curve in the petal. This process will make it stick up and look like a blooming flower. Experiment with crossing the slits over one another to see how it affects the curve in the petal. See picture below.
You will need to make the slit on all the petals. Once they are made you will need to staple the two sides by overlapping one side over the other to make a small curve cup design. Each petal should have this detail before gluing together. Arrange the petals the way they are suppose as a finished product.
To making the middle stigma of the flower, you will need a piece of paper 12 inches long and 4 inches wide. You will first fold it in half so that it is even. Next, you are going to cut small slits along the folded edge approximately 1/8 - 1/4" apart to make the item shown above. The slits should stay 1/3 - 1/2" from the unfolded edge, not cutting through. After you have cut slits down the 12" strip, use a pencil to bring it together by wrapping it tight into one piece. Staple the bottom unfolded edge together and gently fluff the cut strips to bring flare to the edge.
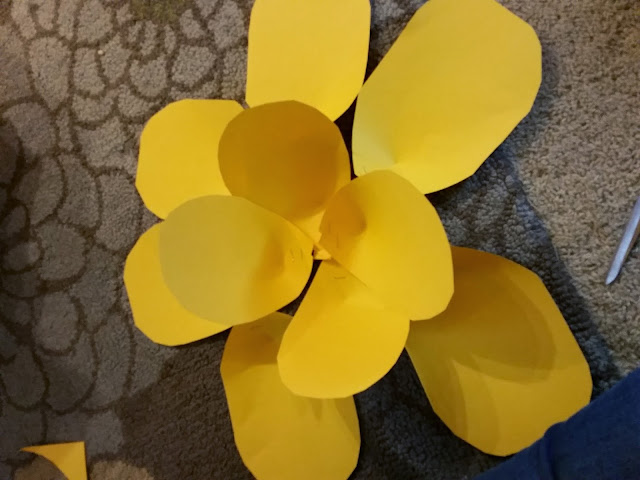
Finally, you have all the pieces cut. Lay them out starting with the large outer petals and slightly overlap your 5 - 6 petals so they create a uniform circle. You will use a hot glue gun to put all of these pieces together. Glue them together at the stapled tear drop edge. Start by gluing the large pieces first, next the middle, then the small pieces and lastly glue the stigma in the center of your flower.
Once you have completed one, you will see the process and it is easier to create a large bouquet by cutting multiple colors and sizes of pieces of paper at once. Make an assembly line and the process becomes quick and easy! Enjoy!!!
Happy Valentine's Day!
Field Trip Mom Blog
Once you have completed one, you will see the process and it is easier to create a large bouquet by cutting multiple colors and sizes of pieces of paper at once. Make an assembly line and the process becomes quick and easy! Enjoy!!!
Happy Valentine's Day!
Field Trip Mom Blog


No comments:
Post a Comment